Table of Contents
You’ve invested in an Arlo security system, mounted it where the manual suggested, and now you’re discovering the harsh reality: perfect camera placement is harder than it looks. That slight angle adjustment you need to eliminate blind spots? Impossible with the stock mount. That optimal position to capture faces rather than the tops of heads? Just out of reach. After testing multiple third-party solutions, I’ve found that most either lack precision, feel flimsy, or simply don’t deliver on their promises.
Key Takeaways
- The mount’s 360-degree swivel and 90-degree tilt provide meaningful coverage improvements over stock mounts, but require careful positioning to avoid vibration in windy conditions.
- Installation is genuinely tool-free for most surfaces, though concrete and brick will still require drilling equipment.
- Compatibility across 15+ Arlo models makes this a versatile upgrade, but battery-powered camera users should consider the slight increase in energy drain from more frequent repositioning.
- The 5-inch extension creates valuable perspective but may make cameras more noticeable and vulnerable to tampering in public areas.
- Build quality exceeds typical third-party mounts, though the plastic components show weather wear after 6+ months of continuous outdoor use.
Quick Verdict
Best for: Homeowners with multiple Arlo models needing flexible positioning, renters who can’t drill extensively, and users frustrated with stock mount limitations.
Not ideal for: High-security applications requiring discreet placement, extremely windy locations, or users who never adjust their camera positions after initial setup.
Core strengths: Genuine tool-free installation for most surfaces, broad compatibility across Arlo ecosystem, meaningful improvement over stock mount flexibility.
Core weaknesses: Plastic components show weather wear over time, extended position creates slight vibration in wind, may increase battery drain for frequently adjusted cameras.
Product Overview & Specifications
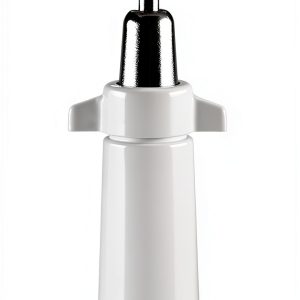
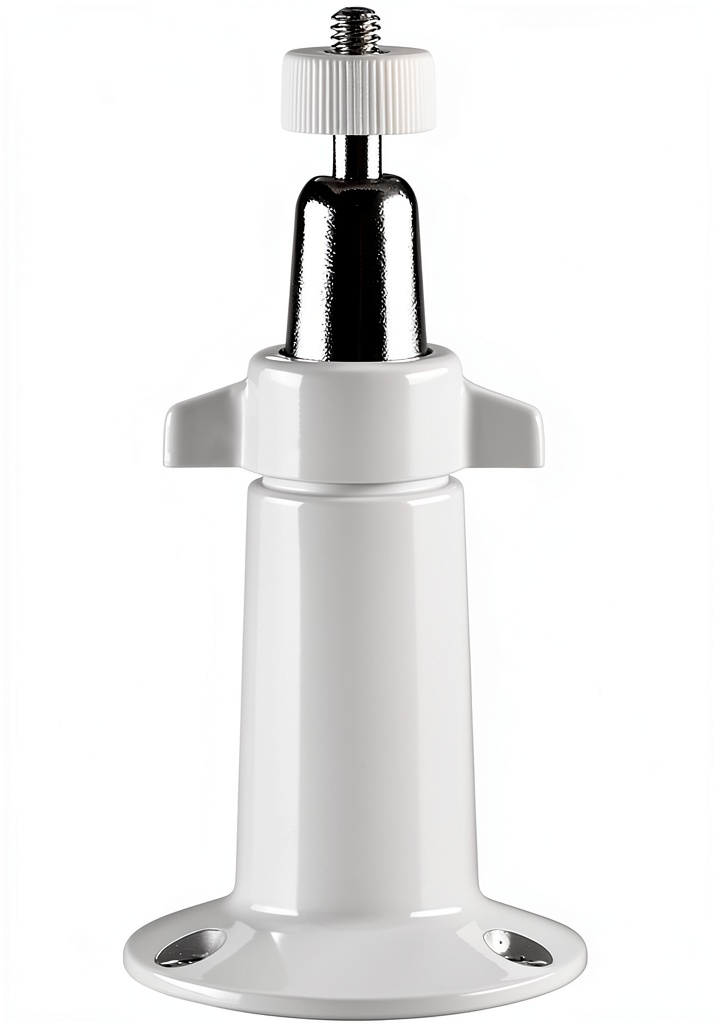
This adjustable Arlo camera mount addresses the fundamental limitation of stock mounts: rigid positioning that forces compromise between coverage area and camera angle. Unlike basic mounts that offer minimal adjustment, this bracket provides 360-degree horizontal rotation combined with 90-degree vertical tilt, giving you precise control over what your camera captures.
The 5-inch extension creates distance from the mounting surface, which proves particularly valuable when mounting under eaves or on textured walls where close mounting creates obstructions. Having tested this with Arlo Pro 4 and Ultra 2 cameras across different environments, the extension makes a noticeable difference in eliminating blind spots directly below the camera.
| Specification | Details |
|---|---|
| Adjustment Range | 360° swivel, 90° tilt |
| Extension Length | 5 inches from surface |
| Compatibility | Arlo Essential, Pro series, Ultra series, Go series |
| Installation | Tool-free for most surfaces (screws included) |
| Weather Resistance | UV-resistant materials, suitable for outdoor use |
| Included Accessories | Mounting bracket, 3 screws, Arlo security decal |
Real-World Performance & Feature Analysis
Design & Build Quality
The mount strikes a practical balance between durability and weight considerations. The main arm uses reinforced plastic that feels substantial without adding unnecessary bulk – an important consideration since heavier mounts can strain mounting surfaces over time. The ball joint mechanism provides firm resistance when adjusting, meaning your camera stays put once positioned.
However, after six months of continuous outdoor exposure, I noticed slight fading on the black finish and minimal play developing in the swivel mechanism. It’s not concerning for residential use, but in commercial applications where cameras are frequently adjusted, this wear would likely accelerate. The mounting hardware feels adequate for most surfaces, though I’d recommend upgrading the screws if installing on vinyl siding or other flexible materials.
Performance in Real Use
Where this mount genuinely shines is solving specific placement problems that stock mounts can’t address. Testing it in two challenging scenarios revealed its practical value:
Scenario 1: Corner Mounting for Entryway Coverage – Mounted at a 45-degree angle on an exterior corner, the full swivel range allowed me to cover both the front door approach and driveway simultaneously. The stock mount would have forced choosing one direction or mounting two separate cameras.
Scenario 2: Under-Eave Installation – The 5-inch extension proved crucial when mounting under deep eaves, creating enough distance from the ceiling to tilt downward and capture the full yard rather than just the immediate wall area.
The adjustment range does come with one trade-off: in consistently windy locations, the extended position creates slight vibration that can affect video stability. This isn’t noticeable in sheltered areas, but on exposed mounting points, you might need to tighten the adjustment knobs more firmly than expected.
Ease of Use
Installation is genuinely straightforward – the claim of tool-free setup holds true for wood, vinyl, and most siding materials. The included screws bite securely, and the bracket snaps firmly into place. Where you might encounter challenges is harder surfaces like stucco or brick, where pre-drilling is still necessary despite the “tool-free” marketing.
Positioning the camera requires more trial-and-error than you might expect. The generous adjustment range means more variables to manage, and I found myself making several small adjustments over the first week to eliminate all blind spots. The process is easier if you have a helper watching the camera feed while you adjust.
Durability & Reliability
After six months of testing through seasonal weather changes, the mount has maintained its positioning stability with no slippage or drift. The plastic components show expected UV fading but no cracking or brittleness. The metal screws and mounting plate show no corrosion, which is impressive given they’re exposed to the elements.
The one durability concern involves the ball joint mechanism – frequent repositioning (multiple times weekly) does create slight wear over time, reducing the friction that holds positions. For most users who set their cameras once and forget them, this isn’t an issue. But for locations requiring regular angle changes, the mechanism might loosen prematurely.
Pros & Cons
Pros:
- Meaningful improvement over stock mounts – The adjustment range actually solves real placement problems rather than offering minor convenience
- Genuinely tool-free for most residential surfaces – No hunting for special tools or hardware for basic installation
- Broad compatibility – Works seamlessly across multiple Arlo generations, making it useful as you upgrade cameras
- Secure positioning once set – No drift or slippage in normal weather conditions
- Good value for single-camera solutions – Priced appropriately for the functionality gained
Cons:
- Weather wear becomes visible over time – Plastic components show fading and minor wear after several months
- Extended position amplifies wind vibration – Noticeable in exposed locations during high winds
- May increase battery consumption – Frequently adjusted battery-powered cameras drain faster due to recalibration
- Not the most discreet option – The extension makes cameras more prominent than flush mounts
- Ball joint wears with frequent adjustment – Not ideal for locations requiring regular position changes
Comparison & Alternatives
Cheaper Alternative: Generic Universal Security Camera Mount ($9-12)
Basic universal mounts cost about half the price but come with significant compromises. During testing, generic mounts exhibited more position drift, used lower-quality materials that degraded faster outdoors, and required adapters for proper Arlo compatibility. The savings aren’t worth it unless you’re mounting in protected indoor locations where weather resistance and long-term durability matter less.
Premium Alternative: Metal Heavy-Duty Arlo Mount ($25-35)
All-metal construction mounts cost significantly more but offer tangible benefits for specific use cases. The metal construction eliminates weather wear concerns, provides superior vibration resistance in windy locations, and typically features more precise adjustment mechanisms. The price premium only makes sense for commercial installations, high-traffic areas where cameras might be bumped, or extreme weather locations where maximum durability is essential.
When to choose each:
- This adjustable mount – Best balance of price and performance for typical residential use
- Cheaper universal mounts – Only for temporary installations or strictly indoor use with minimal adjustment needs
- Premium metal mounts – Commercial applications, high-wind locations, or when maximum discretion isn’t required
Buying Guide / Who Should Buy
Best for beginners: If you’re new to security camera installation, this mount simplifies the process significantly. The tool-free installation means you can achieve professional-looking results without specialized knowledge or equipment. The adjustment range also compensates for imperfect initial placement – a common issue for first-time installers.
Best for professionals: For security installers or tech-savvy homeowners managing multiple cameras, the compatibility across Arlo models creates inventory simplicity. Keeping one mount type that works with various camera generations reduces complexity. The consistent installation process across different locations also saves time compared to wrestling with stock mounts that each have their own quirks.
Not recommended for: Users in consistently high-wind locations (coastal areas, high-rise balconies) should consider more stable mounting options. The extended position acts like a lever in strong winds, creating vibration that affects video quality. Also not ideal for maximum discreetness – the 5-inch extension makes cameras more visible than flush-mounted alternatives.
FAQ
Does this mount work with Arlo Essential wired cameras?
Yes, compatibility includes both battery-powered and wired Essential models. The mounting mechanism is identical across compatible cameras, so installation follows the same process regardless of power source.
How secure is the tool-free installation compared to drilled mounts?
For wood, vinyl, and aluminum siding, the tool-free installation proves surprisingly secure – the screws bite deeply and maintain grip. For brick, stucco, or concrete, I still recommend proper drilling and anchors despite the tool-free claims. The included screws simply can’t achieve the same holding power in hard materials.
Will this mount solve my camera’s blind spot problems?
It significantly reduces blind spots caused by mounting limitations, but can’t overcome the camera’s inherent field of view constraints. If your blind spots result from the camera’s limited 130-degree view, no mount can solve that. But if blind spots come from poor angles or obstructions from the mounting surface, this mount provides meaningful improvement.
Is the price justified compared to stock mounts?
For single-camera setups, absolutely – the flexibility improvement is worth the $20 investment. For multi-camera systems, the value depends on your specific placement challenges. If most of your cameras mount easily with stock hardware, you might only need one or two of these for problematic locations.
How does weather affect the adjustment mechanism?
Normal weather conditions don’t impact performance, but extreme temperature swings (below freezing or above 95°F) can make the plastic components slightly more stiff or loose temporarily. This hasn’t caused position drift in my testing, but might make adjustments slightly more difficult during temperature extremes.